My water bill last December doubled and I blame my kitchen faucet. When the bill came I wasn’t surprised actually, just annoyed. Six months later and it still bothers me.
It did have something to do with the 17 house guests that stayed for Christmas. (yes, of course I love my relatives)
The fact that we constantly cooked that week, kept our Energy Star dishwasher dutifully cycling away. Any remaining dirty dishes got hand washed.
You know the drill: a kitchen volunteer scrubs, suds then rinses with the hot water running – - often straight down the drain.
Not to discourage free help but, how does one tactfully approach grown men and young adults about their thriftless dish washing technique?
In this instance I chose to shut up, wait for the bill but that’s not all…
Until we replace our kitchen faucet with a conserving WaterSense model, here’s the exact guerrilla tactic I used.
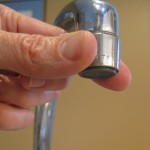
 I simply replaced the kitchen faucet aerator cartridge inside my existing faucet.
A new aerator can cut my water usage in half. Besides, WaterSense faucet aerators are the effort-less way to save water.
Initially, faucet designers included aerators to eliminate water splashing. Conservation minded folks know the water saving potential because they ease water flow rate and modify streaming patterns.
Different aerator screen designs cause air to mix with passing water which then passes through different nozzle spray caps.
Kitchen faucets without aerators can gush as much as 3 to 5 gallons of water per minute (gpm). My original factory-supplied aerator supplied 2.2 gpm.
Inexpensive replacement aerator cartridges range from 0.5 to 1.5gpm. For kitchens, I like 1.0 gpm aerators.
Even if you are ‘all thumbs’, you can do this super easy, inexpensive strategy.
Even if you rent, this is also an easy way to save water.
1. Simply unscrew what appears to be a cap on the end of your faucet. If a wrench is necessary, place cloth over the area to prevent damage.
2. Remove any old washers that might be caught inside the spout.
3. Clean the threads on the faucet. Hard water and lime deposits may have accumulated over time.
I used a WaterSense 1.0 pgm Neoperl Super Saving Faucet Aerator.
4. Place the new aerator insert into the original housing.
5. For housing with outside threads, use the thicker washer. Twist it onto the faucet spout by hand.
6. Test by turning the faucet on. If a leak occurs, tighten the cap more firmly.
Now don’t tell my family that I put this WaterSense aerator in okay? I figure I’ll have enough time between now and the fall holidays to replace my old faucet.
In the meantime, my whole family will be conserving water without even knowing it! Pretty tricky huh?
What do you think?

